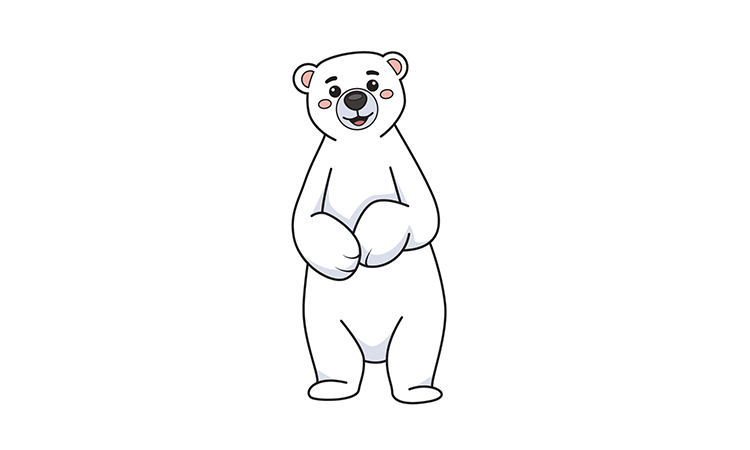
How to Draw a Polar Bear
Polar bears must be found all through the Cold area. Subsequently, it is doubtful that we’ll see one very close except if you’ll head out toward the North Pole. Why not draw a charming polar bear? By calculating how to draw one, you’ll readily keep your own polar bear right public. Every guidance accompanies terms you can use as optical aids, simplifying the standards. The greatest aspect? You can remodel your drawing and handpick the types as well!
Visit the Children coloring pages for kids’ education.
Polar Bear Drawing Step By Step
Step 1:
Start by drawing a layout of the polar bear’s head on the upper piece of your paper. You can create the polar bear’s top by drawing an unexpected ring shape with two crescents per side over the authority stating the ears. You can make reference lines by drawing a meeting vertical and flat line across your paper to guarantee that the polar bear will be drawn to the middle. The upward line over the actual line in the middle is where you should draw the polar bear’s shelter. By doing this, you will have adequate room at the base for the whole body of the polar bear.
Step 2:
Draw an illustrative bent body under the polar bear’s crown to structure the component. Secure the arm is estimated, as shown in the system. Please observe that the arm we’ll draw in this step is the left arm. Subsequently, it ought to be on the left half of the polar bear.
Step 3:
Define a calculated descending boundary on the right side underneath the top of the polar bear to frame the right arm. Then, at that moment, define a bent edge that almost shapes a bad circle straightforwardly associated with the associate. It makes the hand finish the right arm of the polar bear. After completing this step, the two arms of the polar bear ought to now be completed.
Step 4:
Go on by defining a somewhat bent boundary underneath the passed-on arm to frame the left half of the polar bear’s lower body.
Visit for free hd photos kids.
Step 5:
Summarize the last step on the rebellious side to finish the style of the softer body. Right now, the lower body ought to be organized entirely. Presently, all the body is missing are the legs, which we’ll go after in the subsequent stage.
Step 6:
Define short bent boundary-looking inverse headings in the lower part of the polar bear’s lower body. It makes the two legs of the polar bear. To make the two feet, define another boundary framing a sideways oval shape at the lower part of every leg. Remember that the feet of the polar bear ought to look inverse headings, as displayed in the representation above.
Step 7:
In this step, we will draw the subtleties and standards of the polar bear’s body. It assists in making your polar hold-on for looking sensible. From the top to the base, continue drawing a shape inside every ear following its unique framework. It makes within ears. Then, at that point, draw a little circle shape inside the substance of the polar bear, featuring its nose.
Stp 8:
Continuing toward the facial highlights of the polar bear, go on by drawing an unpredictable circle shape for the nose. Then, draw a little sideways oval shape inside the nose at that point. A while later, two associated bent lines beneath the nose. Then, at that point, define a bent boundary right under to shape the mouth. Remember to add a bent line inside the mouth to shape the tongue of the polar bear!
Visit the latest News update on our Pakistan time news.
Step 9:
Determine two short bent boundaries preparing the curved eyebrows. Ensure that the eyebrows are thick and adjusted to one another. Then, at that moment, draw a spiral shape under every eyebrow to create the eyes. Add shade to the eyes while leaving out a little spot unshaded to cause the eyes to seem like it’s flashing! Draw a sideways oval shape on the two cheeks for an extra sensational impact. It creates your polar bear’s cheeks look washed! Now that we’ve effectively drawn a polar bear, it’s at last time for the most thrilling part: picking the tones and shading the polar bear.
Polar bears are dominatingly white in variety, which empowers them to cover in their cold climate easily. In any case, do you know that the polar bear’s jacket has no white shade? You can select a variety of the polar hold-on for its unique white tone or utilize a remarkable arrangement of varieties. One way or another, we’re certain the tones will be delightful!
Make your polar bear drawing far better!
Make some truly cool craftsmanship with these tips for your polar bear sketch! This drawing of a polar bear looks lovable and cheerful for all intents and purposes. However, it would be considerably more joyful with a companion! Fortunately, you have completed this aide and know you want to draw a second polar bear.
It may be presented the same way as the first, and you could utilize more modest subtleties to separate it. Or, again, you could provoke yourself to draw a completely new posture! If you want to give this polar bear organization another way, add other creatures you like.
These could be creatures you hope to track down in a similar climate as a polar bear. Or, on the other hand, you could go for some other creatures you love, regardless! It could be enjoyable to add various types of bears to show the difference between them and polar bears. Which creatures might you want to have spending time with, this delightful polar bear? For this polar bear drawing, we meant to make a cute animation adaptation of this creature. We love how it looks. However, you could draw it to different styles whenever you have dominated the plan.
For example, you could look into some photographs of truly polar bears and use them to make your drawing more definite and practical. Or, on the other hand, you could attempt to make a polar bear in a more strange and misrepresented style. Regardless of which craftsmanship styles and different options you do or don’t add to your polar bear sketch, you could complete everything with a tomfoolery foundation. Polar bears generally live in blanketed conditions, so you won’t be guaranteed to establish an exceptional climate. That sounds astounding if you want to add rocks, trees, lakes, and different highlights! What sort of foundation setting could best suit this fine art that you have made?